Monday, December 24, 2012

Day 24: Santa's Favorite Chocolate Chippers


Well, here we are.... 24 cookies later. The. Last. Day.

Tomorrow is Christmas and I don't think that my family – or my waistline – can take another batch of cookies. This project was one of pure enjoyment for me and I loved every minute of every batch. It gave me something creative back that I have not had in a long time. Something other than work, or for my kids. Something just for me that I wanted to do. I haven't done that in a long time! I never really thought people would actually read the blog because it was on a whim that I posted the first day on Facebook. I am honestly surprised (and flattered) at how many of you I have run into that have said you are following my adventures.  Thank you!!

So until next year (if I choose to do this again) or until I open a bakery someday, somewhere... I hope you have enjoyed our time together. I know I have.

This cookie is our family favorite and I have it on good authority that these are one of Santa's favorites too.

Merry Christmas everyone and best wishes for a Sweet 2013.
Tonya

Santa's Favorite Chocolate Chippers
2 1/4 cups all-purpose flour
1 teaspoon salt
1 teaspoon baking soda
1 cup (2 sticks) unsalted butter, softened (I like Giant Eagle - for the northerners or Kroger - for the southerners, both generic)
3/4 cup granulated sugar
3/4 cup brown sugar
2 eggs
1 1/2 teaspoon pure vanilla extract ( I use vanilla bean paste for these)
1 cup of milk chocolate chips (I use Ghirardelli)
1 cup of mini semi-sweet chocolate chips (I use Nestle)
  • Preheat Oven to 375 degrees
  • Mix flour, salt and baking soda in bowl and set aside
  • Cream butter and sugar un medium speed until fluffy
  • Add eggs, mix
  • Add vanilla, mix
  • Add flour mixture and blend until well mixed
  • Stir in chocolate chips
  • Using tablespoon or 1/4 cup scoop (your choice) drop dough onto cookie sheet and bake 8-10 minutes for smaller cookie or 12-14 minutes for larger cookie or until edges set. 

Sunday, December 23, 2012

Day 23: Kris Kringle's Krinkles


After a long ride home from Ohio, I must apologize for the late post....

When I discovered I could no longer enjoy a snickerdoole, I went on search of a cookie that had a similar texture/taste to the dough (cream of tartar). I ran into a cookie at an exchange one year that made it's way to my take-home container BUT I did not know who brought it and the thought of asking 75 different people was just too daunting.... So, I searched high and low and finally settled on combining a few recipe to get to this. It is a lemon-lime zest cookie (you could use orange zest). I personally think it is fabulous. I have named them Kris Kringle's Krinkles.

I hope today found you hustling and bustling with Holiday Cheer. Only one more cookie to go! Hint: Tomorrow is Santa's favorite!

Kris Kringle's Krinkles
1/2 cup unsalted butter, softened
1 cup granulated sugar
1/4 teaspoon baking soda
1/4 teaspoon cream of tartar
1 egg
1 tablespoon finely shredded lemon peel
1 tablespoon finely shredded lime peel
1/2 teaspoon pure vanilla extract
1 1/2 cups all-purpose flour
Nonpareils or sugar to coat tops
  • Preheat oven to 375 degrees
  • Cream butter for 30 seconds
  • Add sugar, baking soda and cream of tartar, beat until combined
  • Add egg, lemon peel, lime peel and vanilla, mix to combine
  • Add flour, mix
  • Place Nonpareils or sugar in small bowl
  • Roll dough into 1" balls and dip tops in Nonpareils or sugar
  • Place on cookie sheet and bake for 9-11 minutes
  • Transfer to rack to cool


Saturday, December 22, 2012

Day 22: Oreo Ho Ho Truffles

 
Today I needed a no-bake solution to my cookie post as the oven was in use at my in-laws, so I, under no circumstances, could get access to it. At my sister-in-law Stephanie's suggestion she gave me a wonderful new recipe for what we are calling Oreo Ho Ho Truffles, because that is what they taste like! These little balls of Heaven are easy and delicious and only 3 ingredients! I hope you enjoy, I am off to eat "Christmas" Dinner.

Oreo Ho Ho Truffles
1 package of Oreos, Crushed with a food processor
1 brick of Philadelphia cream cheese
1 package of chocolate bark
  • Crush Oreos in food processor and place in bowl
  • Add softened cream cheese and blend to mix (you may need to use your hands)
  • Let set in refrigerator for 1 hour
  • Dip in melted chocolate bark (follow package instruction)
  • Chill to set if needed


Friday, December 21, 2012

Day 21: Peppermint Bark


Such a sinful treat. Thank goodness Christmas comes only once a year! I absolutely love the peppermint bark that you can buy at that "high-end cooking store in every mall in America"...but I hate the price. So I set out to figure out how to get close to their recipe, I think I may like mine better (My cousin, Lindy, may concur.) Maybe it is because it is sooo easy to make, so inexpensive and honestly, it's mine, made from my own two hands and heart. I always think that holds the most value, don't you?


Peppermint Bark
12 oz. good quality semi-sweet chocolate chips (I used Gharardelli chips)
1 1/2 teaspoons peppermint extract
16 - 22 oz. good quality white chocolate chips (I used Nestle chips - Gharardelli melts chalky)
4-5 candy canes, crushed or broken
  • Line a 9” x 13” baking dish with aluminum foil, shiny side up, and smooth out any wrinkles
  • Place the semi-sweet chocolate in a double boiler over simmering water (not boiling) and stir until the chocolate is melted
  • Layer in the pan lined with aluminum foil and set to cool in refrigerator to 10 minutes
  • Meanwhile, melt the white chocolate according to package directions IN A MICROWAVE (I don't know why, it just works better, you can do the chocolate this way too)
  • Layer it, working quickly, over the semisweet chocolate. (I don't mind if  the chocolates mix a bit, I like the look...)
  • Sprinkle with broken candy canes (you can crush or break in a baggie to the extent that you like)
  • Allow to cool in refrigerator until set
  • Remove from pan by grabbing foil and then break the bark apart 


Wednesday, December 19, 2012

Day 19: Reese's Peanut Butter Cookies


I have been making these for many, many years. Without tipping my hat to my age, this recipe came my way right about the same time my marriage license did. My favorite memory of these yummy little packages of joy include a past boss of mine, Jeff. He LOVED these cookies (and tequila, but that is another story all together!) So much so that he would drop little hints when he needed his "cookie fix". I strongly suspect they never made it out of his office. I finally got to the point that I when would make a batch for us, I'd also make a batch for him, presented neatly in a brown paper lunch sack sitting on his desk. Miss those days...


Reese's Cup Peanut Butter Cookies
1/2 cup white sugar
1/2 cup firmly packed light brown sugar
1/2 cup softened unsalted butter
1/2 cup smooth peanut butter
1 large egg
1/2 teaspoon vanilla
1 1/2 cup flour
3/4 teaspoon baking soda
1/4 teaspoon salt
  • Preheat oven to 375 degrees
  • Cream white sugar, brown sugar, butter and peanut butter until smooth
  • Add egg and vanilla
  • Add salt, baking powder and flour and mix to incorporate
  • Roll into 1” balls or use a 1” scoop. Place one ball into each hole of a mini muffin tin. Fill any empty spaces with water to ensure even baking
  • Bake for 8-9 minutes
  • Remove from oven an push one unwrapped mini reese cup into each cookie
  • Let sit in pan for 3 minutes then remove to wire rack. Trick is to use a butter knife or off-set spatula to gently remove the cookies. 
By the way, I generally do not use the white Reese's cups but if you can find them, use them, they are YUMMY!

Monday, December 17, 2012

Day 17: Vanilla Chunk Chex Mix

This is not a cookie, no ma'am, but then again, some of my best holiday treats aren't cookies at all. In reality, sometimes people are just sick of cookies this time of year. What I like most about this treat is that most of the ingredients are "good" for you (I did say most). Best of all it satisfies the sweet & salty tooth all at once.

This year I made it for JP's advisory-mates. (Sam is so "over that") I know a bunch of 6th graders will love this stuff and it gives me a reason to only have a small amount left in the house. As you can imagine, by day 17, we have had our share of Christmas goodies. So I made the mix, which took all of 15 minutes start to finish, let it dry and popped it in plastic bags tied with festive ribbons and presto, I was good to go!

Just a simple holiday treat when you don't have much time.


Vanilla Chunk Chex Mix
recipe shared with me by my cousin Deri Kelly Hutton

1 bag of holiday plain M&Ms
3 cups Corn Chex cereal
3 cups Rice Chex cereal
3 cups Wheat Chex cereal
2 cups salted dry-roasted peanuts
2 cups small pretzel twists
2 cups mini marshmallows
1 package (20 oz.) white chocolate bark
  1. Mix all ingredients into large bowl and set aside
  2. Follow melting instructions on package of white chocolate bark (I use microwave method)
  3. Gently fold in white chocolate using a rubber spatula
  4. Spread on wax paper, cool completely
  5. Break into chunks 


Saturday, December 15, 2012

Day 15: Pecan Pie Bars


My heart is heavy and my mind isn't in a baking mood as the television continues to report on yesterday's senseless violence. I have shut off the noise for awhile and will return to it later when I can get my hands around it all. Things like this seem to hit me particularly hard anymore. I know what loss feels like and I often think about losing my kids and what it would do to me. Unfathomable, really. So I will pray. And bake.

In light of everything, I changed what I was going to bake today and made something that I wanted. "Comfort food for Tonya". Pecan Pie (Bars). Really, I should just make my pecan pie. It is full of bourbon and oh so good. (I have added bourbon to this recipe for your enjoyment and as my "medicine".) I really hate to make a crust for just one pie... so for now, enjoy the pecan pie bars....

I am going on record that pecan pie is my favorite. If a menu has it listed, I see nothing else on the page. I'm pretty sure that I have never, not ever, met a pecan pie I didn't like. Even those little pecan pie cups that make their way to the cookie tray are a favorite of mine so this recipe should be no surprise or exception. It makes a pretty large batch so you can be generous with your cutting. Make the squares BIG, after all, it's the holidays. Top with a nice healthy scoop of homemade bourbon whipped cream (heavy cream, powdered sugar and bourbon, whipped on high until stiff peaks form). So that unopened bottle of Maker's Mark in my liquor cabinet saw it's pretty red wax seal broken this morning, but it was worth it. One for the recipe, one for the cook! Nothing like a Starbucks and bourbon on a Saturday morning. :)

Until tomorrow - Bake, and pray.

Pecan Pie Bars
1 1/4 cups all-purpose flour
1/2 cup powdered sugar
1/4 teaspoon salt (absolutely needed)
1/2 cup butter, chilled and cut into cubes

2 eggs, slightly beaten
1 cup chopped pecans
1/2 cup firmly packed light brown sugar
1/2 cup light corn syrup
2 tablespoons butter, melted
1 tablespoon bourbon (dealer's choice)
1 teaspoon pure vanilla extract
1/4 teaspoon salt
  • Preheat oven to 350 degrees. To make the crust, combine flour, powdered sugar and butter in a processor or by cutting with a pastry cutter. Mixture should resemble coarse crumbs. Pat crumb mixture into an ungreased 11"x7"x 1/2" pan. Bake 20 minutes or until light brown.
  • For the filling: Mix together eggs, brown sugar, corn syrup, pecans, 2 tablespoons melted butter bourbon, vanilla and salt. Spread evenly over baked crust. 
  • Return to oven and bake 20 minutes more or until filling is set. Cool on a wire rack in the pan. 


Friday, December 14, 2012

Day 14: Oatmeal Raisin Rounds

Today is just an oldie but goodie, requested by my youngest. I so wish I could eat one of these because the smells in the kitchen are phenomenal! They have cinnamon and raisins in them, so sadly, I'm out! Sometimes the best recipes are the oldest don't you think? I hope you enjoy them with a tall glass of milk, and hey, the oatmeal makes them healthy, right?

This weekend is a big weekend of baking in the house. Trying to get the goody gifts ready to give before everyone packs up and heads out for the holidays. I have the tins ready, cupcake boxes made, baggies and ribbon and a list of needed ingredients to produce my treats. This is why I love this season. Game on!

I hope this weekend find you wrapped up in holiday cheer whether it is an apron or a drink you "tie on", have fun doing it!

Until tomorrow, Sweet on!

Oatmeal Raisin Rounds 
1/2 cup plus 6 tablespoons unsalted butter, softened
3/4 cup firmly packed light brown sugar
1/2 cup granulated sugar
2 extra large eggs
1 teaspoon pure vanilla extract
1 1/2 cups all-purpose flour
1 teaspoon baking soda
1 teaspoon ground cinnamon
1/2 teaspoon salt
3 cups oats (I used 2 cups quick and 1 cup old fashioned, rolled), uncooked
1 cup raisins

  • Heat oven to 350 degrees
  • Cream butter and sugars until fluffy
  • Add eggs and vanilla, mix well
  • Add flour, baking soda, cinnamon and salt, mix well
  • Add oats and raisins (I did it in the mixer fitted with a paddle, hand mix if using beaters)
  • Drop by rounded tablespoons or a medium scoop onto tray lined with parchment paper
  • Bake 8-10 minutes for smaller cookies, 12-15 for larger cookies
  • Cool one minute on tray then move to wire rack

*You could make them bar cookies and ice those bad boys with buttercream (YUM). To do this, bake in a 13" x 9" pan for about 30 minutes.

Thursday, December 13, 2012

Day 13: A Buckeye at Heart


No matter where we (Dave & I) hang our hats, our hearts always belong to Ohio. It is where we were born, met (at age of 15), went to college (Ohio University, University of Dayton & The Ohio State University) and started our family. Ohio holds many great memories for us. Most of our friends and family still live there and those who don't probably feel the same. Once a Buckeye, Always a Buckeye...

To pay homage to the Heartland, I thought that making Buckeyes was in order. If you aren't familiar with a Buckeye, it is a peanut butter candy dipped in chocolate. Looks pretty much like the real thing. I pulled out Dave's Mee Maw's recipe but it made an amount that could feed a crowd and the thought of rolling little peanut butter balls all night just didn't work for me. Then JP said, call Miss Mandy, hers are the BEST. Oh, straight to the heart, I tell you. But, I would do anything for my boys, even if it meant admitting defeat in the Buckeye making arena. They are basically the same recipe in a manageable amount BUT the biggest difference is the surprise ingredient in her chocolate. Paraffin (i.e Gulf Wax). I immediately emailed her and said, "Isn't paraffin wax?" She answered yes, told me where to find it in the grocer and sent me on my merry little way. Just to put your mind at ease...

Paraffin wax, classified as a chemical preservative, is widely used on fruits, vegetables, and candy to make them shiny and pretty as well as to retard moisture loss and spoilage. Waxes are made from vegetable oils, palm oil derivatives, and synthetic resins, as well as other materials.

Yes, it is edible. Paraffin wax is often added to chocolates. The addition of paraffin to the chocolate candy gives it a nice, glossy finish and helps it remain solid at room temperature. Be aware that paraffin is flammable when overheated, so warm it gently in a double-boiler or microwave only to the point where it is melted. 

You can find paraffin wax, also sometimes called baker's wax or canning wax, in your grocery store where canning jars and supplies are sold. However, some paraffin is not intended to be ingested, such as that sold for candlemaking, so check the label. 

Gulf Wax Paraseal Canning Wax, Household Paraffin Wax is a popular brand of paraffin used for canning and chocolate-making. 

The recipe is super easy and be prepared if you have not had a Buckeye before that you will not just eat one. And, if you don't like the idea of wax, don't use it, Dave's Mee Maw didn't. You just have to refrigerate them after they are dipped to set the chocolate. 

Happy rolling and Go Bucks


Buckeyes
recipe from Mandy Ramicone

Center Mixture
1 1/2 cup peanut butter
1/2 cup unsalted butter, softened
1 pound confectioners sugar
1 teaspoon pure vanilla extract

Mix all ingredients. Roll into small balls, about 1" in diameter. Refrigerate for 30 minutes. Dip into chocolate mixture with wooden toothpick, leaving small amount uncovered. Once set, "smoosh" hole together with fingertip to cover toothpick mark.

Chocolate Mixture
Melt 1/2 bar paraffin (ok, mine came in 4 bars to an entire block and I only used one bar but recipe calls to use 2) and 12 oz. package semi-sweet chocolate chips in top of double boiler over hot water. 

Wednesday, December 12, 2012

Day 12: Oreo Cookies & Creme Cookie Bars


Like I said yesterday, a little birdie delivered some Cookies & Creme Kisses to to me (thanks Kim) and I have been dying to try my version of this cookie bar. Oh. My. Goodness. It is soooo good. Not too hard to make either. I made an original batch to "test", then another for Kim's family and then another because they are so, so yummy. When you find the Cookies & Creme Kisses (by Hershey) GRAB them and HOARD them in your pantry, you will want this treat throughout the year. Each bag makes about 3 batches so I figure 5 or so bags would get me through the year (5 x 3 = 15, ok, maybe my family will need more!)

Anyway, try them. Plan on a good long run, trip to the gym or a serious guilt trip after you have devoured the entire pan before the kids get home from school. Don't say I didn't warn you....

Pure bliss! Go Get Your Sweet On My Friends!


Oreo Cookies & Creme Cookie Bars
adapted from The Picky Palate

1 stick unsalted butter, softened
1/2 cup granulated sugar
1/2 cup packed light brown sugar
1 extra large egg
1 teaspoon pure vanilla extract
1 1/2 cups all purpose flour
1/2 teaspoon baking soda
1/2 teaspoon salt
1 cup mini chocolate chips
12 Oreo Cookies, cut into 4s
20 Cookies and Cream Hershey’s Kisses

  • Preheat oven to 350 degrees and line an 8"×8" inch baking pan with foil sprayed with cooking spray.
  • Cream butter and sugars until fluffy. Add egg and vanilla, mixing to combine. Add dry ingredients, chocolate chips and oreo cookie pieces, stirring to combine. 
  • Press 1/3 of the dough into the bottom of prepared baking pan (I used a little bit more here)
  • Top with 4 rows of Hershey’s Kisses 4 per row. 
  • Top with remaining dough and gently press. 
  • Bake for 25-30 minutes, until golden brown. 
  • Let cool for 30 minutes, remove from pan by lifting foil, cut.

Monday, December 10, 2012

Day 10: Avalanche Bars


I am admitting up front that I have never, not ever, tried this recipe before this post. I must say, for a Rice Krispie bar, it's actually pretty awesome. 

JP looked up cookie bars online and found a picture of what he wanted me to make. They were called Avalanche Bars. Upon further investigation, it seems they are a popular treat hailing from a deliciously famous chocolate store. The very same store that makes the best haystacks I have ever had! Who knew? Not me.

So I gave it a try. It is a glorified Rice Krispie treat, but with white chocolate and peanut butter that mixes marshmallows and mini chocolate chips into the insane goodness of this pretty little bar. And it's easy. BONUS!

Until tomorrow my cookie pals....
Keep Calm and Eat Sweets!


Avalanche Bars

12 oz bag of white chocolate chips (I used Ghirardelli but I would use nestle next time)
1/4 cup creamy peanut butter (Jif)
3 cups puffed rice cereal
1 1/2 cups mini marshmallows
1/4 cup mini chocolate chips (nestle) + some for garnish

  • Lightly grease a 9"x9" pan
  • In microwave-safe bowl pour in white chips and heat on 50% power for 1 minute. Stir and continue in 30 second increments until chips are melted.
  • Combine the peanut butter with the melted chips and add the puffed rice cereal.
  • Let cool approximately 15 – 20 minutes stirring every 5 minutes or so to help cool.
  • Add the marshmallows and the mini chocolate chips and stir to combine.
  • Pour mixture into the pan and press lightly with the back of a spoon or wax paper, but do not compact too much.
  • Press the remaining chocolate chips into the top for garnish.
  • Allow to cool before cutting.

Sunday, December 9, 2012

Day 9: Dark Chocolate Chip Cookies


I have not made these in a long time. Mainly because I can eat the batch (or the batter) before they make it to the cookie jar! My boys don't love chocolate and Dave will eat one, so what else am I supposed to do? I know, right? I have to eat them - God forbid their feelings get hurt! As not to gain the dreaded 25 pounds of Christmas, I will, by twisted arm, give these away too.


Dark Chocolate Chip Cookies
1 4 oz. bar of dark chocolate (53% cocoa)
1 bag dark chocolate chips (I used Ghirardelli, 60% cocoa)
1 cup all-purpose flour
1/4 cup unsweetened cocoa powder (I used Hershey's but you could use any)
1 teaspoon baking powder (for "fluffier" cookies) or 1 teaspoon baking soda for "flatter" cookies)
1/2 cup unsalted butter (1 stick)
1/2 cup light brown sugar, firmly packed
1/4 cup granulated sugar
1 extra large egg
1 teaspoon pure vanilla extract

  • Preheat oven to 325 degrees. Line baking sheets with parchment paper.
  • Melt 4 oz. bar of chopped chocolate in microwave on high for 45 seconds, stir, then an additional 30 seconds if needed or until melted. 
  • In a bowl, mix flour, cocoa, baking soda & salt and whisk to incorporate. Set aside.
  • Cream butter and sugars.
  • Add melted chocolate, mix well.
  • Add egg and vanilla, mix well.
  • Add flour mixture until incorporated.
  • Stir in bag of chocolate chips.
  • Drop by 1/4 cup measure 3" apart on cookies sheets.
  • Bake 16-18 minutes.

**I think these would be awesome with those cherries I used yesterday but had used them all up. Also, crushed candy cane chucks would make them look fantastic but I only like peppermint in bark form...so you are on your own there.

Saturday, December 8, 2012

Day 8: White Chip, Cherry & Macadamia Nut Cookies

The other day "someone" asked me to try a "new" recipe. Soooo, here goes. Last night I went to Kroger and picked up the following:

  • White chocolate chips
  • Dried cranberries infused with cherry juice
  • Macadamia nuts 

I set out to plan a recipe. I knew I wanted festive. I knew I wanted a chewy, deep flavor so I used only brown sugar. I knew I wanted white chocolate with something nutty, thought about pecans but went with Macadamia nuts instead. The result is below:


Here's what I learned...

  • They are a wetter cookie batter (not bad just need to compensate)
  • I needed to use parchment paper
  • I like big cookies so they took 15 minutes to bake
  • They would be AWESOME as a pan cookie drizzled with white chocolate

White Chip, Cherry & Macadamia Nut Cookies
1 cup unsalted butter, at room temperature
1 1/2 cups packed brown sugar
2 extra large eggs
2 teaspoons pure vanilla extract
2 1/2 cups all-purpose flour
1 1/2 teaspoon baking powder
1 teaspoon salt
1 bag of white chocolate chips
1/2 - 1 cup Macadamia nuts
1 5oz bag of dried cranberries, cherries, blueberries...
  • Heat oven to 350 degrees
  • Cream butter and brown sugar on medium for 4 minutes or so (it changes consistency)
  • Add eggs, one at a time on low speed, making sure the first one is incorporated before adding the second one
  • Add vanilla, mix
  • Add salt, baking powder and flour, incorporate well
  • Fold in nuts and cherries
  • Drop cookies on parchment lined sheets or spread in 13 x 9 (or so) pan.
  • Bake: Large cookies for 15 minutes, small cookies for 8-10 minutes and pan for apps. 25-30 minutes.

I hop you enjoy. I thought they were fantastic. (I REALLY liked the cherry infused cranberries.

Eat Sweet!

Thursday, December 6, 2012

Day 6: Kiss the Cook(ies)


Today I was at a PTA Holiday Breakfast with some wonderful women to find out that people are actually reading and baking from this blog (thanks for the support!). There was a special request for some "new" cookies, i.e. not the ones that are already in the recipe box. I am so sorry to disappoint today but this cookie is an oldie but goodie. I promise something new age tomorrow! I just want to say thanks again baking buddies - loving the love!

When the cookie tray comes around, these are the first ones I grab. I make them all year in my cookie rotation because, well, I just LOVE them. It is not a new recipe by any means. I can remember them from my childhood when Aunt Olive brought us our annual Christmas cookie tray (my Mom, rest her soul, was NOT a cook/baker).

Loved them then, still love them today. Here's hoping you will too!


Kiss the Cook(ies)

1 3/4 cup of all purpose flour
1 teaspoon baking soda
1/2 teaspoon salt

1/2 cup unsalted butter (no substitutes)
1/2 cup peanut butter (I use Jif, because "choosy moms chose Jif"®)
1/2 cup granulated sugar
1/2 cup light brown sugar
1 extra large egg
1 teaspoon pure vanilla extract

1 bag of Hershey Kisses®
Extra granulated sugar to roll dough balls, I used red and green sanding sugar

  • Preheat oven to 350 degrees
  • Mix dry ingredients (flour, baking soda and salt) in a bowl and set aside.
  • Cream butter, peanut butter and both sugars together. Add egg and mix well. Add vanilla extract.
  • Mix dry ingredients into the wet ingredients until well incorporated.
  • Shape dough into 1" balls and roll in additional sugar
  • Bake for 8-10 minutes
  • Working quickly, press one Hershey Kiss® in the center of the cookie, smashing the cookie out. 
  • Eat copious amounts!

Wednesday, December 5, 2012

Day 5: Birthday Bones (for that special pup)


Today is my Max's seventh birthday. I can't believe he is seven and I don't remember a day without him. Max is my oldest shih tzu baby. Love him to death and yes, he and his brother, Brock (Beeps), are the most spoiled, smart and loving dogs I have ever owned. (no bias here!) So to celebrate Max, JP and I thought it fitting to make him birthday bones!


They are made completely of a humanly edible food, but also good for a dog. We rolled them then cut them out in the shapes of doggie bones and fire hydrants... Max and Beeps sure loved them, some happy pups of JP's friends are getting a nice treat too! Make a batch for your pooch and test them out!


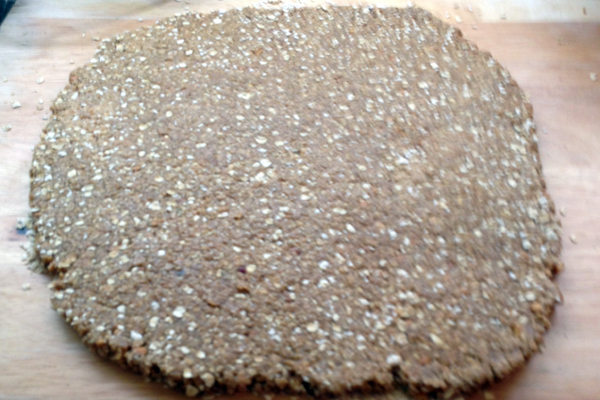
Birthday Bones (Peanut Butter, Honey and Oat Cookies)
adapted from the Ultimate Dog Treat Cookbook

1 cup crunchy natural peanut butter
3 cups quick oats
1/3 cup honey
1/3 cup low-sodium beef bouillon powder
1/3 cup warm water

  • Preheat oven to 350 degrees
  • Warm peanut butter in microwave for about a minutes until it is soft enough to mix
  • Grind quick oats in food processor until a course flour
  • In a large bowl, combine all the ingredients
  • Work the dough onto a breadboard sprinkled with more of the ground oats until you can form a ball. Roll out to about 1/4" thick
  • Use a cookie cutter of your choice to cut the shapes of the cookie
  • Bake for about 10 minutes or until the bottoms are golden brown
  • Let cool thoroughly. Store in an air tight container

Tuesday, December 4, 2012

Day 4: Chocolate Covered Pretzel Rods

Today I'm a bit frazzled...bit off more than I could chew.

√ Yard work/leaf clean up (thanks for the help Dave)
√ Outside lights & decorations
√ 2 trees up (not yet decorated, maybe one tonight)
√ Gifts for nieces and nephews
√ Dinner served
√ Chocolate covered pretzel rods


Soooo super simple! Chocolate Covered Pretzel Rods. Oh how I love my salty and sweet. JP will single handedly eat every one of these bad boys!

I figured I had to mix in some old stand-bys to make sure we didn't all have cookie overload and I could survive today!

Well, the recipe is a bit of a joke. It's not really a recipe at all but rather a list of needed items:
  • Wax paper
  • Plates with a flat rim
  • Sprinkles, Jimmies, mini chocolate chips, whatever "little" add-on you want to roll your pretzel in. (think crushed heath bars, Oreos, etc.)
  • Double boiler or saucepan and Pyrex bowl
  • Pretzel rods
  • Chocolate or white chocolate bark
  • Imagination
Heat chocolate in a double boiler or in a Pyrex bowl over hot water. Once melted, use a spatula to cover half of the pretzel with the chocolate. Don't put it on too thick or it won't hold the "goodies". Immediately roll the chocolate covered pretzel in your choice of toppings that are spread on your plates. Once you are satisfied with the pretzel, lay it on the wax paper to harden. Easy-peasy for a frazzle day!

Eat on friends - but always keep it sweet!


Sunday, December 2, 2012

Day 2: Subway's Sugar Cookie Knockoff

A "knockoff" of a cookie, did you hear me right? Yep, you sure did. And if you have ever eaten at Subway, you know the real star on their menu comes in the form of a cookie, their soft, round sugar cookie to be specific. If you don't believe me, try one (or this recipe), and you'll see what I mean.

For those of you who know me and my baking, my sugar cookies are usually not round (or naked). But in reality, unless I am making those "fancy cookies" for a special occasion, they sit on my cake stand until I have eaten every last one or they get pitched because they are old. My kids are just over them, so to speak... So when Sam (my oldest) asked me to make him sugar cookies, you can imagine my excitement, until he finished with "you know, like Subway's sugar cookie, they are sooo good". So I set off to please and with a mix of this recipe and a tweak of that one... I think I have come close.

Make them and decide for yourself. I can bet they won't sit in your cookie jar long.

Happy Baking!


Recipe: Subway's Sugar Cookie Knockoff

Dry Ingredients:

  • 2 3/4 cups all-purpose flour (a pinch more if your dough is too soft and sticky)
  • 1 teaspoon baking soda
  • 1/2 teaspoon salt

1 1/4 cups unsalted butter (2 & 1/2 sticks) NO SUBSTITUTES!
2 cups white sugar
2 eggs
2 teaspoons Pure vanilla extract

1/4 cup Demerara sugar (I added in so fun colored sugar as well)


Preheat oven to 350 degrees. Stir together dry ingredients in a bowl and sit aside. In large bowl, cream butter and sugar until fluffy. Add eggs, one at a time, incorporating one before adding the next. Add vanilla extract. Gradually stir in dry ingredients until incorporated.

Using a small scoop or spoon, form dough into balls and roll in Demerara sugar. (you can roll entire ball or just tops, your preference). Place cookies on a baking sheet for 8-10 minutes until just light, light brown (or firm - I don't like them too browned) on the edges. Remove from oven and cool on baking sheet about 5 minutes to set as centers will be soft. Move to wire rack and cool completely. Devour.


Saturday, December 1, 2012

Day 1: Grandma Suzie's Pizzelles

I thought it fitting to start with a family tradition.... Pizzelles  
Pizzelles are a light, crispy italian cookie that are made using a pizzelle press. 


I learned how to make these from my husband's Grandma Suzie. When her grandkids were little, she found that they did not like the traditional anise flavored pizzelles so she improvised with orange extract. They make a light, crisp cookie - not too sweet, but just enough. They are great with a tall glass of milk or a warm cup of coffee. Today we made ours green and red at the suggestion of my youngest son and sous chef, JP. We used AmeriColor Soft Gel Paste food coloring to get just the right green and red but don't use the grocery store type or your batter will be too runny!

Coffee cans make for a great storage solution but if you don't have them on hand, I have also found that the plastic containers found at the grocery store work great too. You will need a pizzelle iron to make this wonderful treat - mine is a VillaWare ,as was Grandma Suzie's, but any brand will do.


Grandma Suzie's Pizzelles:
6 eggs
1 1/2 cup of granulated sugar
1 cup melted butter (cooled)
1 tablespoon of vanilla extract
2 teaspoons of orange extract (or more to your liking)
4 teaspoons of baking powder
2 1/2 cups of all purpose flour

Beat eggs and sugar. Add cooled, melted butter, vanilla and orange extract, mix well. Add baking powder and flour, mix well. Batter will be thick. Drop by kitchen tablespoon onto hot press. Count to 30 - or whatever your iron allows for a nice light brown cookie (if using food coloring, be careful not to burn). Remove with fork and lay flat on cooling rack for a few minutes. Store in coffee can or other air tight container. Enjoy!

Wednesday, November 28, 2012

My kids think I'm crazy... What's new?

It's true. My kids think I'm crazy for committing to bake a different cookie each day during the Christmas season. 25 different cookies (brownies, bars and sweets included) starting December 1st. They are not at all excited about the prospect of having to eat all those cookies either. I know what you're thinking, what kid wouldn't LOVE to eat all those cookies, but my kids are picky that way. Maybe it's because they have always had homemade cookies and sweets available to them and have already made up their mind as to what they like and don't like in the world of Mom's sweet treats. My husband is no help either. Unless it is a chocolate chip cookie, a pizzelle or a brownie, he walks right on by. So local friends and neighbors, kid's teachers, co-workers and random strangers will become the recipients of my Christmas goodies. For now I am busy testing recipes, making lists and getting the ingredients ready. If you want to follow along or try your hand at them, I will post pictures and recipes of the edible delights (and possibly failures). See you in a few days with the first treat of the season.

Wishing you Merry Baking and a Happy Sweet Season!
Tonya